Workspace Setup
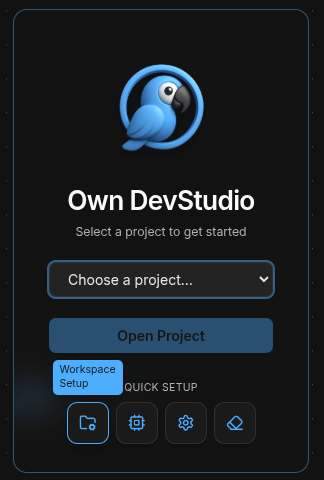
When you first open Own DevStudio (ODS), you’ll see the Select a Project page.
From here you can either open an existing project or click Workspace Setup to configure your workspace.
Step 1 — Open Workspace Setup
On the Select Project page, choose the Workspace Setup option (bottom left).
Step 2 — Configure Workspace Root
In the setup dialog, choose your Workspace Root Directory.
This should be the parent folder where your project folders live.
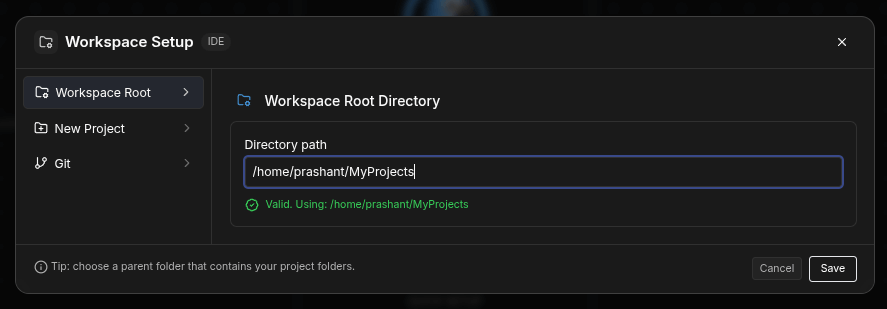
- Enter a directory path (No Browse, as work in network).
- A green checkmark confirms the path is valid.
- Click Save to continue.
What’s next
- After saving, you can create a New Project or clone an existing one with Git.
- These options are available directly in the Workspace Setup panel.
Tip
You can update your workspace root at any time by reopening the Workspace Setup dialog from the start screen.
Step 3 — Create a New Project Folder
Once your workspace root is set, you can create a new empty project folder inside it.
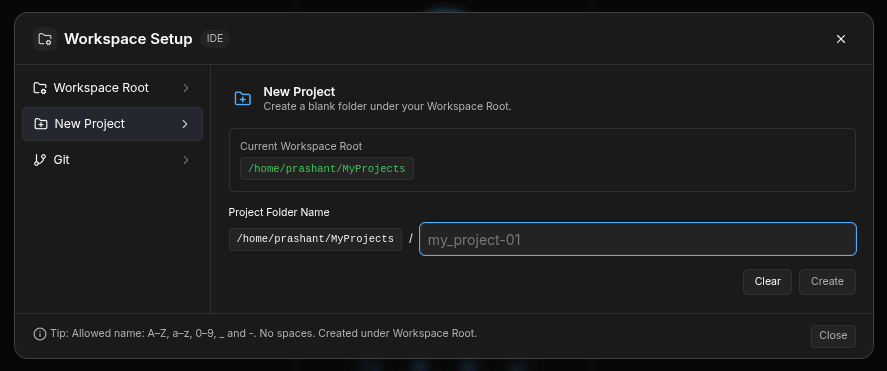
- Go to New Project in the Workspace Setup sidebar.
- Enter a Project Folder Name (allowed:
A–Z,a–z,0–9,_,-, and.). - Click Create to add the folder under your workspace root.
- The folder will be created immediately inside your chosen root directory.
Tip
Use clear, consistent names for projects to keep your workspace organized.
For example: my_project-01, demo-app, or site-docs.
What’s next
- After creating a project folder, you can open it directly in ODS.
- You can repeat this process anytime to add more projects under the same workspace root.
Step 4 — Clone a Git Repository
You can also bring an existing project into your workspace by cloning a Git repository.
Open Git Tab
From Workspace Setup, select the Git option in the sidebar.
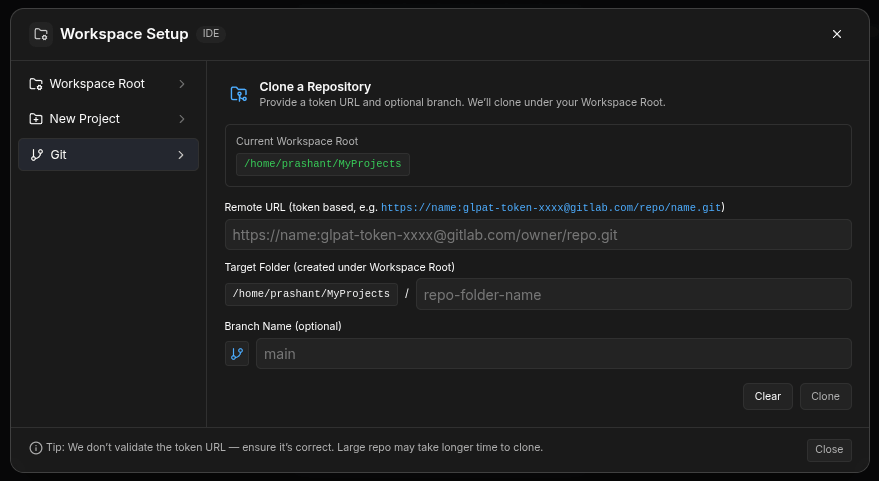
Enter Repository Details
- Remote URL: paste the HTTPS clone link. Token-based URLs are supported (e.g.
https://name:token@host/owner/repo.git). - Target Folder: by default under your current workspace root.
- Branch Name (optional): specify a branch (default is
main).
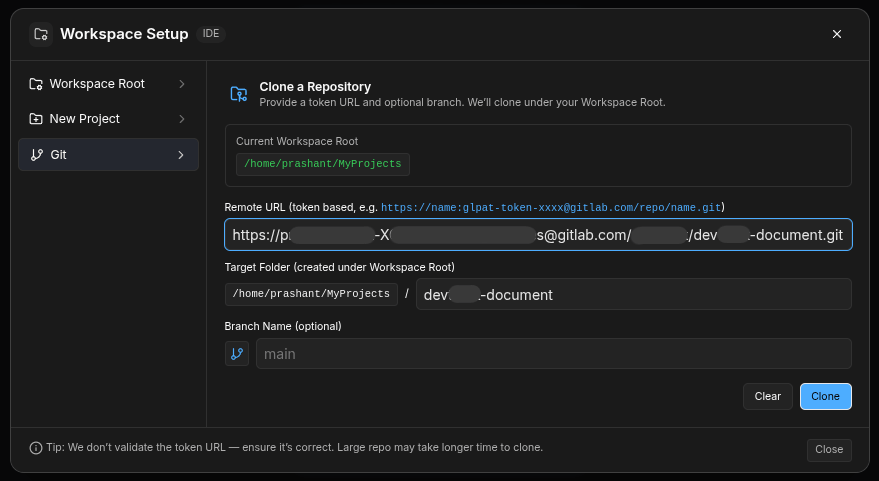
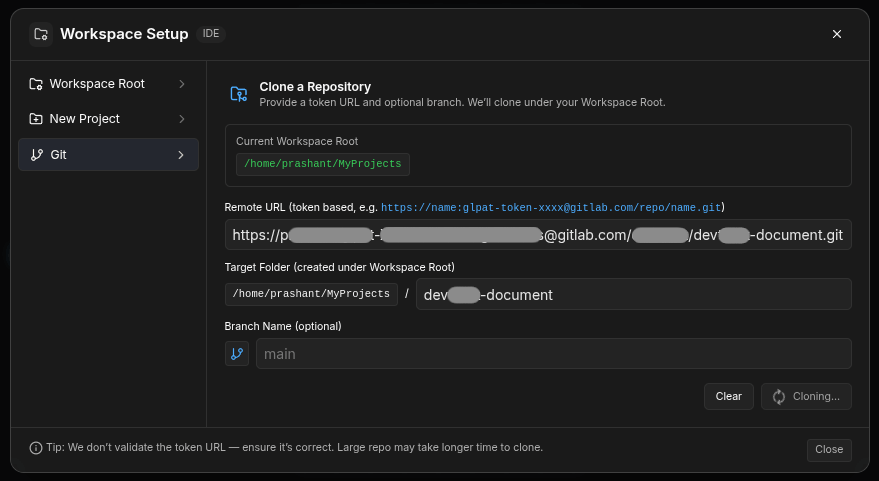
Start Cloning
- Click Clone to start cloning the repository.
- Progress will be shown, and large repos may take longer.
Success
Once cloning finishes, you’ll see a confirmation message with the cloned path.
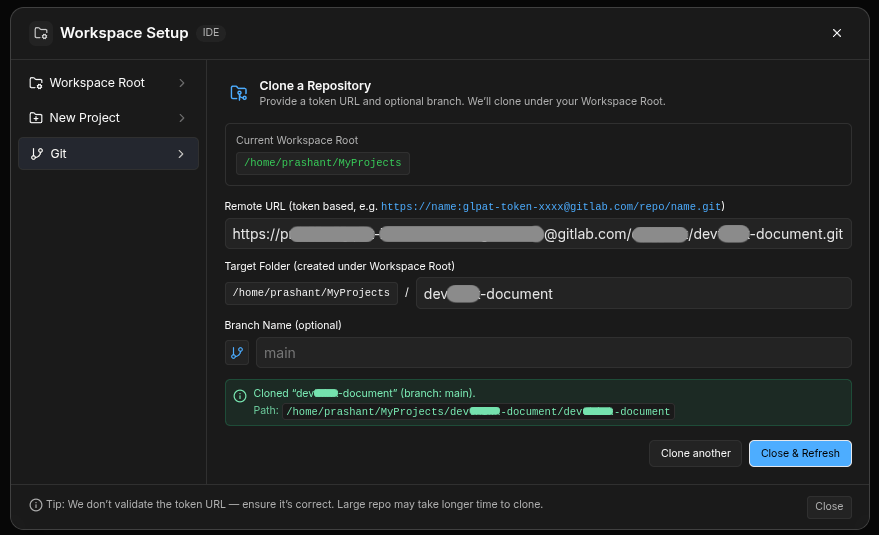
Warning
You must click "Close & Refresh" to take effect and list your clone repo under dropdown (if not reload entire page)
From here you can:
- Open the project directly in ODS.
- Clone another repository if needed.
- Or click Close & Refresh to go back to the start screen.
Note
ODS does not validate token URLs — make sure your URL is correct.
If cloning fails, double-check your credentials and remote path.
What’s next
- Start editing code in your new or cloned project.
- Explore Git integration inside the IDE (commits, history, branches).